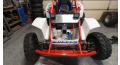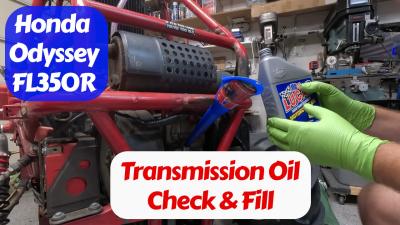
Proper maintenance of your Honda Odyssey FL350's transmission is crucial for its longevity and optimal performance. One key aspect of this maintenance is ensuring the transmission oil is filled correctly. While the owner's manual provides basic instructions, following them to the letter may not provide sufficient lubrication to the upper parts of the transmission. Conversely, overfilling can lead to oil entering the neutral safety switch, causing starting issues.
In this guide, we'll walk you through the correct procedure to fill your FL350's transmission oil, ensuring adequate lubrication without causing problems with the neutral safety switch.
Why Proper Transmission Oil Level Is Important
Maintaining the correct transmission oil level is essential for:
- Proper Lubrication: Adequate oil levels ensure all gears, bearings, and moving parts within the transmission are well-lubricated, reducing wear and tear.
- Preventing Overheating: Sufficient oil helps dissipate heat generated during operation.
- Avoiding Starting Issues: Overfilling can cause oil to seep into the neutral safety switch, leading to electrical problems that prevent the engine from starting.
Understanding the Neutral Safety Switch
The neutral safety switch on the Honda Odyssey FL350 is a critical component that prevents the engine from starting unless the transmission is in neutral. If oil enters this switch due to overfilling, it can cause electrical issues that inhibit engine starting.
Tools and Materials Needed
Before you begin, gather the following:
- Socket Wrench Set: For removing and tightening bolts.
- Transmission Oil Drain Pan: To catch excess oil.
- Funnel: For pouring oil without spills.
- 10W-40 Full Synthetic Oil: As recommended for the FL350's transmission.
- Measuring Container: To measure 16 ounces (half a quart) of oil.
- Clean Cloth or Rag: For cleaning spills and wiping components.
Step-by-Step Guide to Filling the Transmission Oil
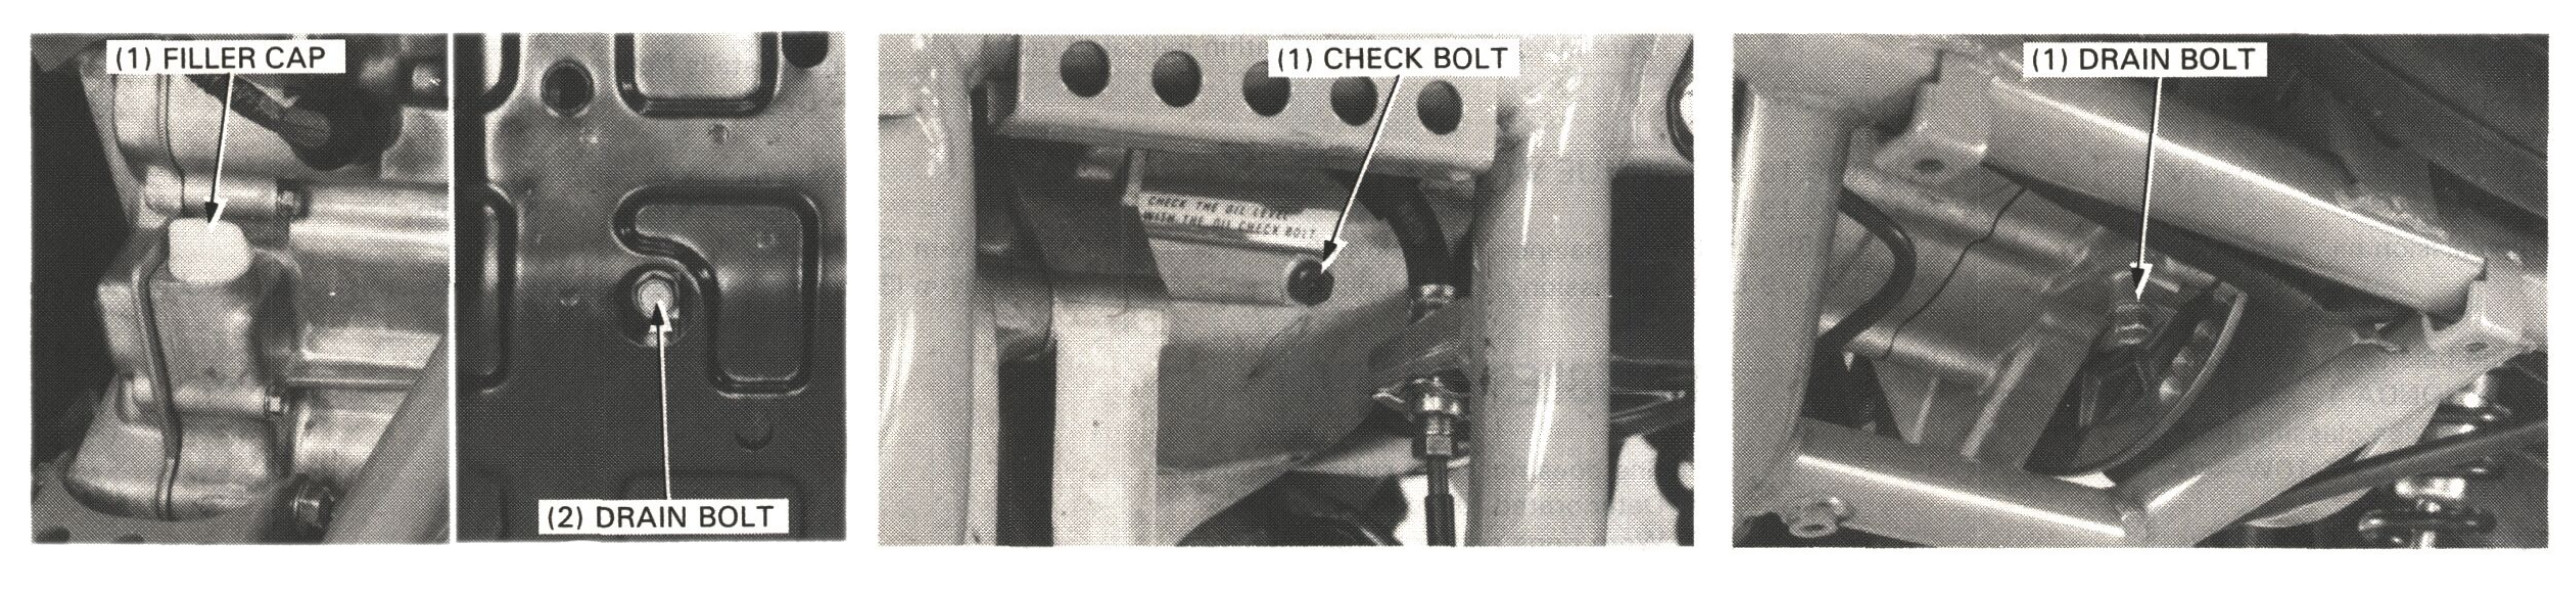
Step 1: Locate the Fill Port and Top-Off Outlet
- Fill Port: This is where you'll add the transmission oil. It's typically a yellow cap located on top of the transmission.
- Top-Off Outlet (Level Check Port): Found on the side of the transmission case, this bolt is used to check the oil level and allow excess oil to drain.
Step 2: Prepare to Drain Excess Oil
- Position the Drain Pan: Place the drain pan beneath the top-off outlet to catch any oil that may drain out.
- Ensure the Fill Cap Is Closed: Initially, keep the fill cap on to observe the effect of a vacuum on the drainage.
Step 3: Open the Top-Off Outlet
- Remove the Top-Off Outlet Bolt: Using a socket wrench, carefully loosen and remove the bolt.
- Observe the Oil Flow: With the fill cap still on, you may notice minimal oil draining due to a vacuum.
Step 4: Open the Fill Cap to Break the Vacuum
- Remove the Fill Cap: Unscrew the yellow fill cap on top of the transmission.
- Notice Increased Oil Flow: Opening the fill cap allows air into the system, breaking the vacuum and enabling excess oil to drain freely.
- Allow Oil to Drain: Let the oil drain until it slows to a drip, indicating it has reached the appropriate level.
Step 5: Close the Top-Off Outlet
- Reinstall the Top-Off Outlet Bolt: Once the excess oil has drained, replace and tighten the bolt securely.
Step 6: Add the Correct Amount of Oil
- Add Oil to the Fill Port Level:
- Use a Funnel: Place the funnel into the fill port.
- Pour Oil Slowly: Add oil until it reaches the brim of the fill port. Since the top-off outlet is closed, ensure not to overfill at this stage.
- Measure Out an Additional Half Quart (16 Ounces) of Oil:
- Use the Measuring Container: Measure 16 ounces of 10W-40 full synthetic oil.
- Add the Additional Oil:
- Pour the Measured Oil: Add the 16 ounces of oil into the fill port. This extra oil ensures that the upper gears and bearings receive adequate lubrication.
Step 8: Check for Leaks and Clean Up
- Inspect for Leaks: Look around the top-off outlet and fill port to ensure there are no leaks.
- Wipe Excess Oil: Use a clean cloth or rag to wipe any spilled oil from the transmission housing and surrounding areas.
Tips and Precautions
- Avoid Creating a Vacuum: Always open the fill cap when draining oil to prevent a vacuum that hinders proper drainage.
- Do Not Overfill: Adding more than the recommended additional half quart can cause oil to enter the neutral safety switch.
- Use the Recommended Oil: Stick to 10W-40 full synthetic oil for optimal performance.
- Dispose of Used Oil Properly: Collect drained oil and take it to a recycling facility.
- Regular Maintenance: Check your transmission oil level regularly, especially before and
Conclusion
By following this procedure, you ensure your Honda Odyssey FL350's transmission is properly lubricated, reducing wear on upper gears and bearings while avoiding issues with the neutral safety switch. Proper maintenance not only enhances performance but also extends the lifespan of your vehicle.
If you found this guide helpful, consider watching the detailed video tutorial linked below for a visual walkthrough.