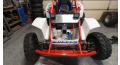
Get your Honda Odyssey FL350 running smoothly with this step-by-step carburetor cleaning guide.
If you're experiencing performance issues with your Honda Odyssey FL350 ATV—such as limited acceleration or the engine not revving properly—a clogged carburetor might be the culprit. Over time, fuel residue and debris can accumulate, blocking the jets and disrupting the fuel-air mixture essential for optimal engine performance. In this guide, we'll walk you through the process of cleaning your carburetor to get your ATV back in top shape for your next adventure.
Tools and Materials Needed
- Socket wrench set (including 16mm and 17mm sockets)
- Screwdrivers (Phillips and flathead)
- Needle or thin wire (for cleaning jets)
- Carburetor cleaner spray
- Replacement gaskets (recommended)
- Clean workspace or bench
- Safety gloves and glasses
- Zip ties (optional for securing loose parts)
Safety Precautions
- Work in a well-ventilated area to avoid inhaling fumes.
- Wear safety gloves and glasses to protect against fuel and debris.
- Ensure the engine is cool before starting to prevent burns.
- Disconnect the battery to eliminate any electrical risks.
Step-by-Step Guide
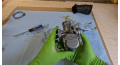
Step 1: Prepare Your Workspace
Before starting, gather all necessary tools and materials. A clean and organized workspace will make the process smoother and help prevent losing small parts.
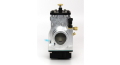
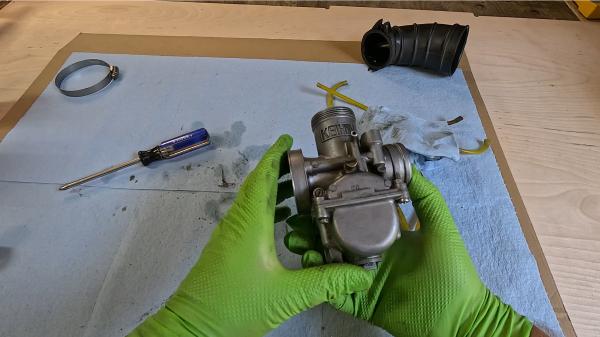
Step 2: Remove the Carburetor
- Access the Carburetor:
- Locate the carburetor between the air filter box and the engine.
- Disconnect Fuel Lines and Cables:
- Carefully remove the fuel line connected to the carburetor.
- Disconnect the throttle and choke cables.
- Loosen Mounting Clamps:
- Use a screwdriver to loosen the clamps securing the carburetor to the intake manifold and air filter boot.
- Detach the Carburetor:
- Gently wiggle the carburetor free from its mounts.
- Be cautious not to damage any surrounding components.
Step 3: Disassemble the Carburetor
- Inspect Before Disassembly:
- Check for any obvious signs of wear or damage.
- Note the positions of hoses and components for easier reassembly.
- Remove the Float Bowl:
- Unscrew the bolts at the bottom of the carburetor using the appropriate socket (usually 17mm).
- Carefully separate the float bowl; be mindful of the gasket.
- Extract the Jets:
- Locate the primary (pilot) jet and secondary jet.
- Use a small flathead screwdriver to remove them.
- Keep all parts organized.
Step 4: Clean the Jets and Passages
- Inspect the Jets:
- Hold each jet up to the light to check for blockages.
- Clean the Jets:
- Use a needle or thin wire to gently clear any debris.
- Spray carburetor cleaner through the jets.
- Clean Carburetor Passages:
- Spray cleaner into all passages and openings.
- Use compressed air if available to blow out debris.
Step 5: Inspect and Clean Other Components
- Check the Float and Needle Valve:
- Ensure the float moves freely and isn't punctured.
- Inspect the needle valve for wear.
- Examine the Float Pin:
- The pin should be secure but allow the float to move.
- Note that in some carburetors, the float bowl keeps the pin from coming out once assembled.
- Identify Any Loose Parts:
- Look for any components that may have come loose, such as small cups or clips.
- Refer to a carburetor diagram if unsure where parts belong.
Step 6: Reassemble the Carburetor
- Reinstall the Jets:
- Screw the cleaned jets back into place.
- Ensure they're snug but not overtightened.
- Reattach the Float and Needle Valve:
- Hook the needle valve onto the float arm.
- Insert the float pin to secure the assembly.
- Replace the Float Bowl:
- Position the gasket properly.
- Screw the float bowl back onto the carburetor body.
- Final Checks:
- Verify that all parts are installed correctly.
- Ensure moving parts operate smoothly.
Step 7: Reinstall the Carburetor
- Mount the Carburetor:
- Position it between the intake manifold and air filter boot.
- Secure Clamps and Connections:
- Tighten the clamps to prevent air leaks.
- Reconnect the fuel line, throttle cable, and choke cable.
- Replace any missing clips or use zip ties if necessary.
- Inspect for Proper Assembly:
- Double-check all connections and fittings.
Step 8: Test the ATV
- Check for Leaks:
- Turn on the fuel supply and look for any leaks around the carburetor.
- Start the Engine:
- Without the air filter (if you're planning to replace it), start the ATV.
- Listen for irregularities and observe the engine's response.
- Evaluate Performance:
- Gently rev the engine to see if it responds properly.
- If issues persist, further adjustments may be needed.
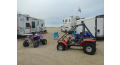
Conclusion
Cleaning your Honda Odyssey FL350's carburetor can significantly improve engine performance and resolve issues with acceleration and responsiveness. While it may seem daunting, taking the time to carefully disassemble, clean, and reassemble your carburetor is a rewarding process that enhances your understanding of your ATV.
Additional Tips
- Consider Upgrading the Air Filter: Switching to a high-flow air filter setup can improve performance and make future maintenance easier.
- Regular Maintenance: Periodically cleaning your carburetor prevents buildup and extends the life of your engine.
- Stay Organized: Keeping track of all parts during disassembly makes reassembly much simpler.
By following this guide, you'll be ready to hit the trails with a smoothly running ATV. Happy riding!